
Working with Oil Pastels: Layering, Blending, and Creating Surface Textures
Oil pastels can do far more than fill shapes with flat colour. Learn how to layer, blend and scratch out textures by changing your pressure and the way you hold the stick.
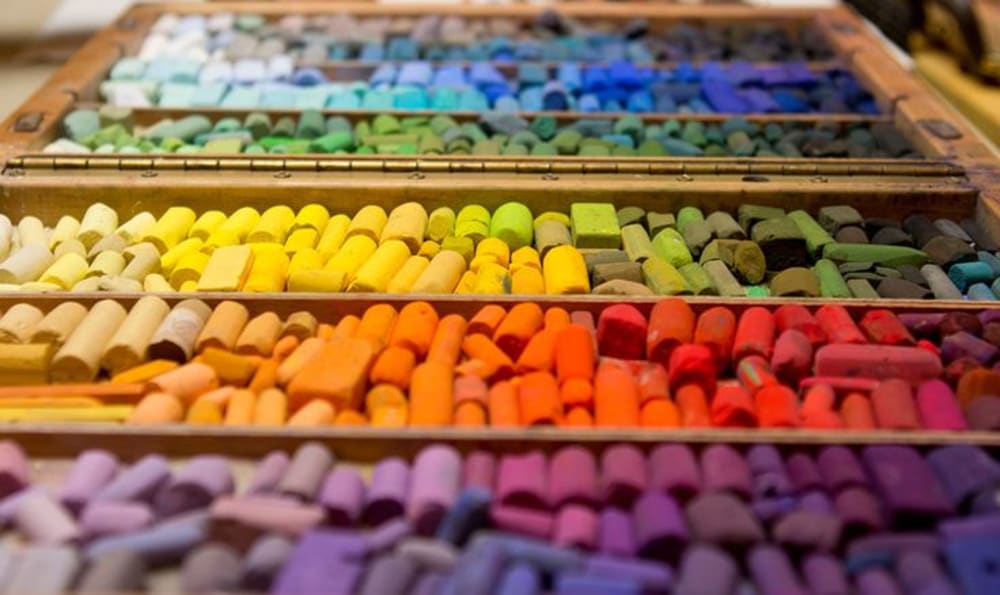
When they pick up a pastel, most people are used to pressing hard and filling the space inside an outline with a single colour. But by changing the pressure on the same stick, turning it onto its side and mixing it with other layers of colour, you can get wonderful artistic results.
The smooth roundness of a mango, the rough surface of tree bark and the delicate colour change in a flower petal cannot be shown by filling in colour the same way each time. Mastering oil pastels means choosing the colour and also managing how you place that colour on the paper.
1. What Are Oil Pastels?
An oil pastel is made by combining pigments, mineral wax and a binder containing non-drying oil. When it is rubbed onto paper, it creates a thick, oily, soft layer of colour. You can usually draw directly with the stick, without water or any other liquid.
Do Not Confuse Them with Soft Pastels: Unlike soft pastels, which are dry and chalky or powdery, oil pastels have a thick, waxy and oily nature. So rubbing them away with a finger or removing them with an eraser is not practical with oil pastels.
2. Preparing the Paper and Basic Tools
- Paper Texture (Tooth): Rather than ordinary smooth paper, slightly rough, thick drawing paper (180-250 gsm) suits oil pastels very well. Pigment holds well among the tiny rough grains of the paper, and it also makes it easier to apply several layers on top of one another.
- Clean Cloth or Tissue: The tips of pastel sticks get dirty with other dark colours, so keep a piece of cloth nearby to wipe them often.
- Hand Guard Paper: To stop your hand smudging the picture as you work, place a clean piece of paper under your hand.
3. Apply the First Layer Lightly (Light Pressure First)
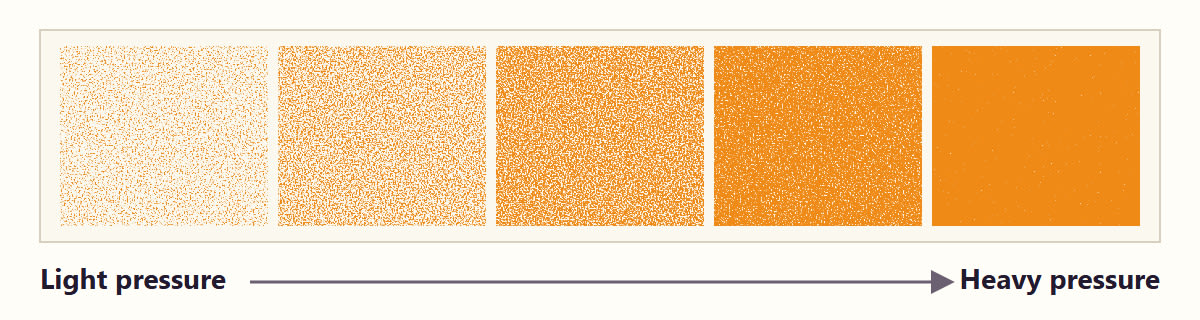
The main mistake beginners make is pressing the pastel stick hard into the paper right at the start and laying down a thick layer. When you do this, the tiny pits in the paper fill with wax and you cannot add another colour on top.
- A Light Base: At the start, use very little pressure and mark only the main light and shadow areas.
- Keep the Bright Areas: Plan the brightest places early, and avoid putting dark colours there. With oil pastels, white applied over a dark colour does not give a clean white.
- Increase the Pressure Step by Step: Once you are sure the basic shapes are correct, gradually increase the pressure to build up the strength and thickness of the colour.
4. How to Blend Two Colours Softly (Blending)
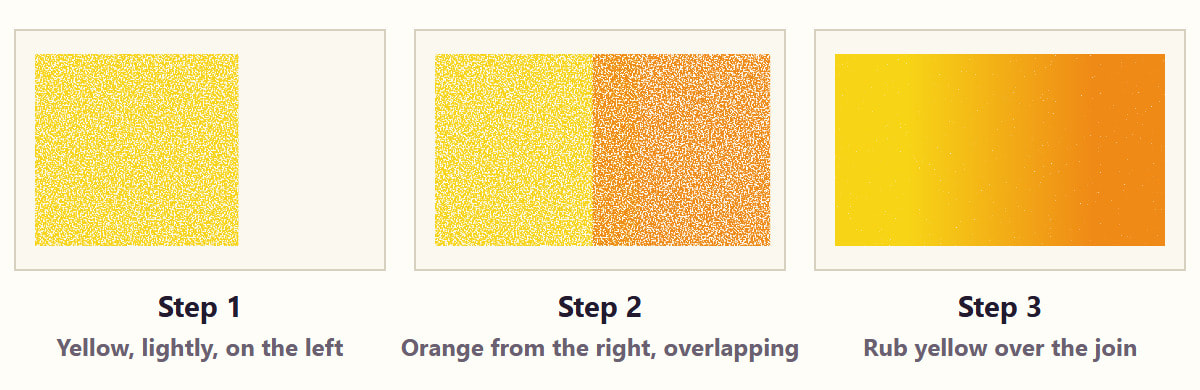
Let us look step by step at how to make a colour transition (gradation) that flows softly from yellow to orange:
- Step 1: Lightly apply yellow on the left side of the chosen area.
- Step 2: Apply orange from the right, and let the two colours just overlap where they meet in the middle.
- Step 3 (Blending with the Lighter Colour): Take the clean yellow pastel stick and rub over the line where the two colours meet, with some pressure, using curved or small strokes. Pushing the lighter colour towards the darker one softens the edge and gives a natural mix of colour.
Using White Pastel: You can also soften the line between two colours with a white stick. However, this lowers the strength of the colours and gives a pale tint, so where you need bright colours, it is better to blend with the lighter colour itself rather than white.
5. Using the Tip and the Side of the Stick for Different Needs
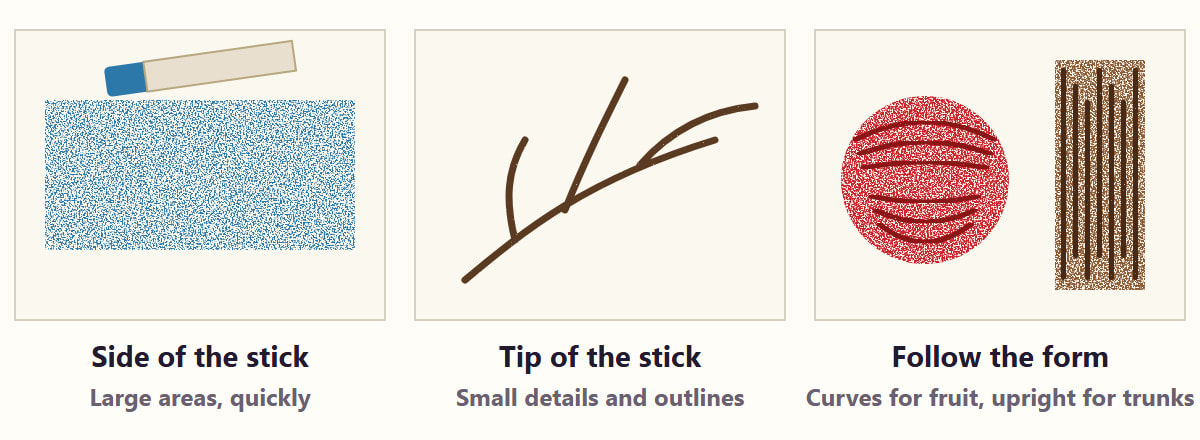
- Using the Side (Side Strokes): Remove a little of the paper wrapper, turn the stick onto its side and rub it across the paper. This helps you cover large areas such as sky, sea, ground or a table very quickly and evenly.
- Using the Tip (Tip Strokes): For small details, thin branches, fruit stems and outlines, hold the stick upright and use its pointed edge.
- Direction of Strokes (Directional Strokes): Pastel strokes should follow the natural curve of the object. Curved strokes for a round apple and rough vertical strokes running from top to bottom for an upright tree trunk bring out the character of the shape.
6. Light, Shadow and Three-Dimensional Form (Volume)
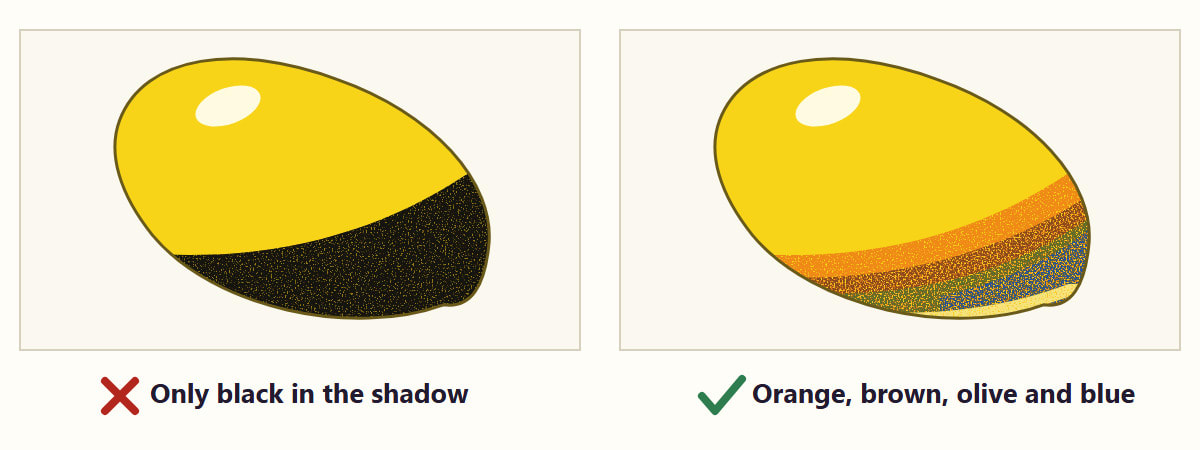
An outline alone is not enough to bring out the roundness of a fruit. You need to show the side the light falls on, the middle tone and the shadow side correctly:
- Do Not Use Only Black for Shadows: Black on the shadow of a yellow mango gives a dirty, muddy colour. Instead, dark orange, brown, olive green or blue gives a more lively, deeper shadow.
- Complementary Colour Layers: To control the strength of a colour, lightly apply its complementary colour (e.g., green for red), and then apply the main colour again on top.
- Reflected Light: Leaving the faint lighter tone reflected from the table at the far edge of the shadow side gives a truly three-dimensional look, with the object seeming to come forward from the paper.
7. Scratching Out Patterns (The Sgraffito Technique)
A special way to bring out fine lines and surface patterns with oil pastels is sgraffito, or scratching out:
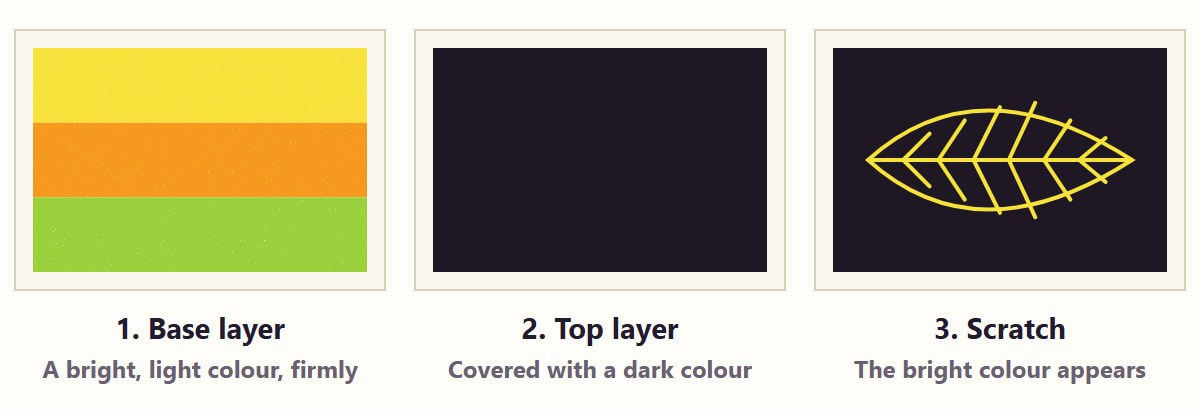
- Base Layer: First, apply a bright, light colour such as yellow, orange or light green firmly on the paper.
- Top Layer: Over it, apply a dark colour such as dark brown, dark blue or black, so that it is completely covered.
- Scratching the Pattern: Take a toothpick, a used pen or a blunt wooden stick and gently scratch away the dark top layer. The bright, light colour underneath appears along the scratched lines.
Where You Can Use It: This is an excellent way to draw the fine veins of leaves, fish scales, animal fur, the cracked lines of tree bark or fireworks.
8. Keeping Colours Clean and Protecting the Finished Work
- Before using a yellow or white pastel stick, check whether unwanted dark colours have stuck to the tip, and wipe it with a piece of cloth.
- A finished oil pastel drawing never dries completely; its waxy nature always remains. So avoid stacking and pressing drawings on top of one another.
- To keep the drawing safe, place butter paper (tracing paper) over it and file it, or fix it in a frame with glass.
Three Practical Exercises
- 1. Pressure Scale: With one pastel stick, colour 5 boxes from the very lightest value to the darkest. This trains you to control the pressure on the stick.
- 2. Gradation: Draw a strip that blends without boundaries from yellow through orange to red. This trains you to lay colour layers on top of one another and soften the edges.
- 3. Single Fruit Study: Colour a mango or an apple placed so that light falls from one side. This trains you to bring out three-dimensional roundness through colour and shadow.
The next time you draw with oil pastels, think for a moment before you fill in the colour:
"Does this place need a soft change of colour? A background drawn with the side of the stick? Or a rough surface to scratch out?"
Then the pastel stick will become more than a tool for filling in colour; it will be a strong medium that brings shapes and surfaces to life!